What sort of a job and what is likelyhood of breakage of bits stuck on with adhesive tape stuff, is it to remove bodykit (standard one) from a 1990 BX16v phase two.
Does anyone have any tips on method and paint type needed to change colour?
Thankyou
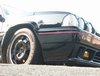
Phase two bodykit
-
ed_straker
- 3000 rpm
- Posts: 169
- Joined: Thu Aug 03, 2006 7:28 am
- Location: germany...don't mention the war!

-
ed_straker
- 3000 rpm
- Posts: 169
- Joined: Thu Aug 03, 2006 7:28 am
- Location: germany...don't mention the war!
C-Pillar panels are an easy job...Hmm, you could use some tools that are used for cutting glas, that would do the trick nicely.
Be careful with the rear wheel arches though, they're glued AND screwed on (EDIT: can be seen when wheels removed).
Btw, anyone know how to remove a phase2 spoiler from the tailgate?!
Be careful with the rear wheel arches though, they're glued AND screwed on (EDIT: can be seen when wheels removed).
Btw, anyone know how to remove a phase2 spoiler from the tailgate?!
Honda Civic Type S
-
thanuttiscotsman

- 7000 rpm
- Posts: 1137
- Joined: Sun Aug 13, 2006 8:16 am
- Location: Scotland
hi there,
im not entirely sure but think pahse 2 spoiler has wing nut style bits on the inside but maybe is just glued. infact i think i differs between the age of the cars. i think the older ones are mainly glued and newer ones bolted in some places aswell. but im not entirely sure.
as i have front wing ph2 kit bits with no nuts inside as spares but the wings i bought from luke recently are bolted and glued to the wing.
tis a bit confusing, rossco
1989 BX 16v ph1 Big project chipped, k+N, scorpion s/s, weber throttle body, Nitrous injection
1990 BX 16v ph2 (now scrapped)
1990 BX 16v ph2 (now scrapped)
-
Anonymous
I got my bits at home with half a bx attached to them 
Got the steel off with lots of patience, hammer and chizzle (correct?)
I was told that it would also be possible to remove them from the bx using wire that's used for a fishing rod. Didn't try this but it could work i think.
Problem is when the old adhesive is removed, fitting could be a problem. I kept the old adhesive on the parts and fitting was perfect and easy
-
Anonymous
Its got a rotten front subframe, burst/corrodes hydraulic pipes and starting to rust on the sills.....tim leech wrote:Whats up with the one your breaking Toby?
However I have an as new (yes really) 1991 BX16 TRS that am going to swap bits over to including engine etc. I've worked on Citroens since 1985 at dealerships and fo myself but have never done any bodywork.
Thanks for all you useful tips.
-
robin hughes

- 5000 rpm
- Posts: 592
- Joined: Mon Sep 04, 2006 5:08 pm
- Location: st austell, cornwall
me and my dad have removed the body kit from a phase 2 before and its not that easy. If you are braking the car (like we did ours) we first drilled the rivets that hold the kit on then got a heat gun. For the rear vents we stripped the boot out and heated the vent from the inside (making the glue hot and soft we carefuly pulles the vent off bit by bit (but very carful and slowly as the fibreglass is brittle and will crack very easily) unfortunatly on removing the vent you will probably destroy the rear quater plastic panel the vent is half glued to!. for the side skirts heat the sills up (the paint will bubble but if your scrapping it it wont matter) the heat does not damage the kit so as the glue melts slowly pull the skirts free from the sill moveing the heat gun down bit by bit as you do so. For the rear wing attachments heat the kit from inside the rear wheel arch and as the glue melts slowly pull the kit away. For the front wing attachments pull the front splash guard out and heat the kit from the inside of the front wing again the glue will melt and the kit should come off slowly. (make sure you take the side skirts off first as the front wing bits slot behind the skirts with a little tab also at the back of the front wing bits there is a fixing you have to remove. i hope this helps.
cheers rob
cheers rob
The citroen bx 16 valve loves garages hates driving
1990 escort rs turbo 220 bhp
1992 bx 16 valve phase 2 red
1990 escort rs turbo 220 bhp
1992 bx 16 valve phase 2 red
-
Anonymous
Yes it certainly does help. Thanks very much.robin hughes wrote:me and my dad have removed the body kit from a phase 2 before and its not that easy. If you are braking the car (like we did ours) we first drilled the rivets that hold the kit on then got a heat gun. For the rear vents we stripped the boot out and heated the vent from the inside (making the glue hot and soft we carefuly pulles the vent off bit by bit (but very carful and slowly as the fibreglass is brittle and will crack very easily) unfortunatly on removing the vent you will probably destroy the rear quater plastic panel the vent is half glued to!. for the side skirts heat the sills up (the paint will bubble but if your scrapping it it wont matter) the heat does not damage the kit so as the glue melts slowly pull the skirts free from the sill moveing the heat gun down bit by bit as you do so. For the rear wing attachments heat the kit from inside the rear wheel arch and as the glue melts slowly pull the kit away. For the front wing attachments pull the front splash guard out and heat the kit from the inside of the front wing again the glue will melt and the kit should come off slowly. (make sure you take the side skirts off first as the front wing bits slot behind the skirts with a little tab also at the back of the front wing bits there is a fixing you have to remove. i hope this helps.
cheers rob