How exactly do you go about cleaning up and painting alloy wheels? I'd like some Goodwood style Pug alloys (ie black or grey Speedlines with silver lip, or maybe all black/grey) and am thinking about creating some of my own as proper one's tend to sell for muchos cash.
Wanna make them look good and not have the paint flaking off after a few months. So preparation advice, and suggestions of good paint to use would be appreciated
your going for the same look as me then!!!
what i have done with mine and previous ones is muchly as follows!!
firstly give the wheels inside and out a bl##dy good clean! i did mine with a fair amount of alloy wheel cleaner/mucoff a wire bruch attatchment on a cordless drill a small wire brush and a brillo pad loL! get them as clean as you can! doesnt matter too much on the condition as they are goignt o get painted anyways!
Sand the rim back to remove any defects allready there and get the finish as smooth as possible, sometimes worth going over with a finer paper after initial sanding,
on the rim edges, i used my dremel with the flexible attatchment and the sanding wheel with sandpaper to clean them up and bring them back to metal! they are a bit of a pain as due to the angle and the shape of the wheel its tricky to get anythign flat on the rim lips!!
clean the wheels down with panel wipe or thinners to make sure you have a clean surface ready fro priming!
Now this may sound odd but is something i have doen since early days of varnishing! Dont paint in the same clothes used for sanding!! the particles formt he sanding can and often do contaminate the paint! (more obvious with varnish!)
when primering, using 1200-1500 wet and dry and flat back the primer, dry off and recoat every coat, repeat until you have a good level of primer! then colour coating is much the same! spray, rub back dry, spray rub back dry until your happy witht he finish!
Before you laquer leave the wheel to cure min of over night and then when flatted back polish up the colour using a compound to give a deep shine, then flat back, dry and you can then laquer! (it sounds odd but its what gives you the really deep glossy look to the colour layer!) do the same with the laquering as the other coats until your happy you have enough, then flat back and polish up and bobs your uncle! (Or Rob's dad!:D)
a tip is to have a heat gun on a moderate heat and wave it over the wheel with one hand as you spray with the other to aid in the drying! But DONT rush it though!
Its pretty much all in the preperation (infamous old saying! 'the 6 p@s!- P1ss Poor Prep Provides Poor Performance!!) as with most things! but also i have found over the years that its also a good idea to keep the same brand of primer, topcoat and laquer! a couple i have doen have gone badly wrong and reacted ont he laquer stage resulting in a lot more work!!
i would say paint wise, for 4 wheels 3 tins of primer, (prolly get away with 2! but the third gives an extra few layers of paint!) 2 - 3 tins of top coat and 2 - 3 of laquer, depending where you get your paint from roughly looking at about £25 - 30 for the lot! (based on my wholesalers prices!) - most refurbers look for £40-50 a wheel!!
also worth doing is putting a layer of satin black or similar on the back of the wheels to keep them looking clean! (worth doing before youstart the topcoating so you dont get any bad overspray through the wheel!!)
Hope that helps??
Timmo
After all i am the Cornish one!
Its Because its French!
Bx16v club - Sharing the love for the unloved!
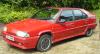
I saw a grey 16v with the Pug alloys on (on the old site maybe) and thought they looked great. At that point I knew wanted the Goodwood stylee alloys for my red car as I love the colour of the standard alloys, just want a different design. Been looking out for some Goodwood alloys since then, but they go for silly money.
Although I'm now thinking white alloys maybe cool too. However I like the way the grey alloys hide the brake dust, which the white ones certainly wouldnt!
But anyways, I need to get a set of alloys yet, so it's a long way off - probably a project for the summer evenings for me and the other half. Once I've got all the other bits done that is!
baz, but that defies the point of having a project! where's the satisfaction in having a set of wheels that everyone sais 'they look good mate, wjhere did you get them done?' and saying, 'some bloke that charges £25 a wheel' when you could say, 'i did them myself'!
and depending on where you get your paint from, for what he charges for one you could do all 4! (i know as you said you dont have the space!)
Timmo
After all i am the Cornish one!
Its Because its French!
Bx16v club - Sharing the love for the unloved!
i do agree with u m8! i usually prefer the project approach but as my car is a 'daily hack' (and i have no space) i need a quick turnaround on gettin em back (for work) as i dnt have a spare set
Got some 205 GTI alloys from ebay, hope they'll arrive before easter.
I am sure it will look horrible because i dont have any experience in painting.
But hey, car's not perfect, so why should i be
BTW, installed stereo today, first time in 1 year i had music in my car